Sunday, May 11, 2014

Last Minute Mother's Day Gift Idea...

May's DIY project ~ hand stamped spoon charms

Custom Designed by The Charm Hunter

  I just LOVE these!  I did this project in an afternoon and you can too, providing
you have all the tools and supplies ready for some creative use.  I took four 
salvaged spoons and forks and repurposed them into beautiful charms in just 
7 steps.  They can dangle from a bracelet or necklace, even one alone with 
a pearl looks fabulous!  These monogrammed initial charms cans symbolize
names of children, grandchildren, wedding couples, or even lucky numbers!
This was made for my mom, one for each of her four children, two of which have
passed, which makes this even more sentimentally special.

Honoring my special mom on this Mother's Day with monogrammed
charms of your loving children, Susan, Michael, George & James.
We Love You SO Much! 


So I have stash that I collect from wherever I find them.  I usually see them in 
Antique Malls and Consignment Shops, as well as garage sales from time to time.
They come in plain or fancy.  "IF" you can buy them separately that's best, but 
most times they're sold in sets.  I've found that the knives are too thick, but the 
forks and spoons are PERFECT.  And, the thinner they are, the easier they are to 
work with, but sometimes, you just don't have that option.


Supply List:

OK, don't cringe when you see the necessary tools needed for this project.  If you don't 
have some of these tools, chances are your husband, in-law, neighbor or friend will.  
Otherwise, overall it's a small investment to make to personalized gifts for friends and 
family throughout the year!

  • Silverware/Flatware, of Sterling Silver or Stainless Steel
  • 8mm Jumprings
  • Necklace chain (I used a ball chain)
  • Single Pearl and Bead Charms
  • 24" Bolt Cutter
  • Power Drill with a bit made for METAL
  • Metal Stamp Punch Set
  • Sanding Block or Metal File
  • Fine Point Sharpie Pen
  • Piece of Scrap Wood
  • Tape
  • Safety Goggles

Step 1:                 
                              Cut ends off with bolt cutter

Step 2:
                                            Vigorously sand ends until dull 

Step 3:
            Determine hole placement with size of drill bit used 

Step 4:
                  Tape piece to wood block, mark spot and begin to
           drill.  Be patient.  These took about four 30 second
        drill sessions each using moderate pressure. (2mn. total)
WARNING!  your piece will be HOT

Step 5: 
                                            Hand stamp initial onto center

Step 6:
            Use a fine tip permanent marker to highlight indention

Step 7:
~~ W O W ~~
           Attach jumprings to each piece, then string onto a chain
                                 (If you're unfamiliar with jumprings read this tutorial first)


               That's it!  YOU can do this.

I just love repurposing vintage finds into new and 
beautiful creations.  Join me!  Click Here to see
the rest of my Assemblage Jewelry.  Read more 
about me and my work here.

Wednesday, April 23, 2014

April Assemblage DIY


May 11th is Mother's Day

~ create a special & meaningful gift ~

~ Beautiful Dangling Assemblage Cluster ~

from the Charm Hunter

This beauty can be assembled in one afternoon.
Grab a friend, you daughter or granddaughter and create
something beautiful together!  This would make a FABULOUS
Mother's Day gift too!
Grab that jewelry box, sewing kit and stash of broken pieces!  This is a fun
and wonderful "quality" time activity to spend with your best friend or loved one.


The Charm Hunter's Supply List:

             (double this list if creating with a friend!)
  • 30" (or more) link chain (a 15" drop)
  • toggle clasp
  • 6 pieces of short misc chain pieces
  • 8 6-8mm jumprings
  • 6 random jewelry elements                                     (pearls, stones, shell, buttons, pendants, bling, etc)
  • 2 pair pliers

                          THAT'S IT!


STEP BY STEP....

You'll need about 30" (+ or -) of any type of link chain.  You may already have or can 
purchase inexpensively at your local craft store.  I like this length because it fits right over 
your head without needing to add a clasp.  You'll also need a medium size toggle clasp
also readily available at your local craft store or online.


The two piece toggle clasp already comes with a link attached to each piece.  I've used 
two straight pins to show how I used a jumpring to attach each part of the toggle to the 
same link in the center of the link chain.  (Do not follow the instructions on the toggle clasp packaging.  We are using the toggle as a decorative element and not as a clasp.)  Use 
your pliers, one in each hand, to open the break in the jumpring by gently pulling and 
prying in opposite directions.  If you've never tried this before, view THIS LINK first.


Next, lay out six pieces of random chain.  They can be of any size and color.


Most pliers have a cutting portion on the top inside of the pliers.  If yours 
do not, you may need a pair of cutting pliers OR simply use the above method
in the link provided above to pry apart an individual link in the chain.  I planned
on each piece being no longer than 3".  Each strand should be cut at
different and random lengths.  There's no rules, just play around with
different lengths.  You can always cut them shorter if needed.


Here are my miscellaneous elements...shell, button, pearls, crystals, etc.


Use your pliers and begin attaching your elements to your pieces of chain.


Once you you have all your elements attached to the ends of your chain
strands, lay them out at varying lengths to see which need adjusting.
Move them around and shorten chains that need shortening.


Now open each jumpring wide enough to fit into the end of each chain link
and then onto the round part of toggle clasp.  Once you've attached to
 both pieces, pull and pry back into the closed position.
Continue with all chain strands.


Wallah!


See other Assemblage Jewelry


I hope you've enjoyed this month's DIY.
Even more-so, I'd like to see YOUR projects!
Please post and share your re-assemblage projects here.

               
                                        Warmest Aloha, Susan

                aka The Charm Hunter          Visit my shop here

Saturday, March 29, 2014

March's DIY Project

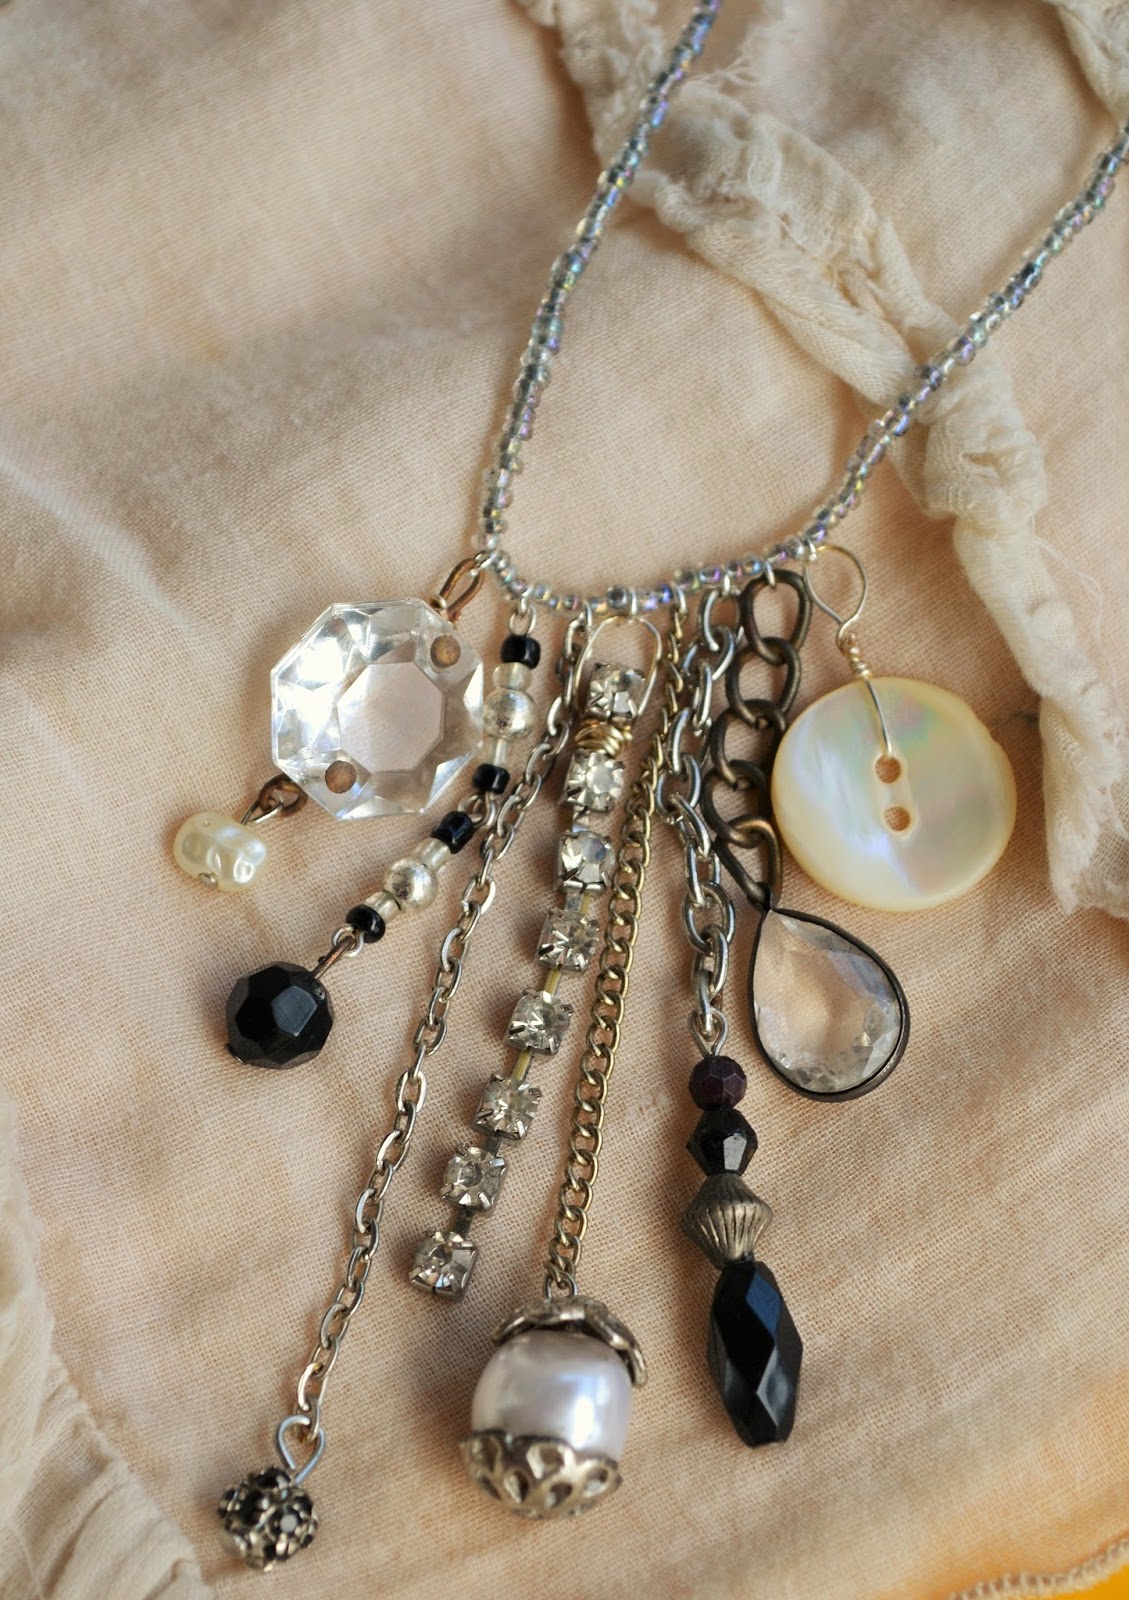
 Re-Assemblage Charm Necklace...


"Re-Assemblage" Charm NecklaceDesign by The Charm Hunter

What is Re-Assemblage?  Assemblage art was born as an act of recycling and repurposing. Fundamentally, it is accomplished by taking something that is broken (or without use in its current form) and putting it together with other found objects to create a piece of art.  Like pieces of a puzzle, you too can use found elements to re-create something new, beautiful and one-of-a-kind.


The Charm Hunter's Supply List:  

  • Seed bead necklace
  • Miscellaneous chains, 5 short pieces
  • Rhinestone strand 
  • Crystal Chandelier Glass Disk
  • Miscellaneous beads, pearls, bling, crystals, buttons, etc
  • 24 gauge beading wire
  • 3mm jumprings
  • 2 pair jewelry pliers
My Big Beautiful Mess!
I'm really a very organized person, but somehow I always
end up working with a pile that looks like this!

STEP by STEP...


As always, make use of what you have.  Mismatched earrings, broken chains, buttons, and out of style jewelry pieces can transformed.  And as I've always said, SAVE YOUR BROKEN JEWELRY.  Don't throw ANY part of it away; you'll be amazed at all the tiny components (findings) that you will re-use!

Here I have a 36" glass seed bead necklace, chandelier glass pieces,
a broken rhinestone necklace, and random beads, pearl, crystal and button.

(You can also use a necklace that you already have - metal chain, leather, pearl, whatever!)

And of course, my famous jar of broken chains.
I used 24 gauge silver beading wire, only because that's what I had on hand.
You can use silver or brass, and/or a thicker wire (The smaller the gauge, the thicker the wire)
Use your wire to wrap around findings to make loops
whereby you can add jumprings to attach to necklace

Here I added a single pearl to the bottom of a
chandelier piece.  Again, if a headpin or wire
loop is missing, make your own with beading wire

I played around with varying lengths of chain and
added my miscellaneous beads to then ends

I used tiny 3mm jumprings to attach each different length of chain
 to the necklace.  HINT:  lay them all out and play around with
placement BEFORE attaching to the necklace


A simple wire wrapped button makes a nice touch.  Don't over think wire wrapping - the more
wrapping and the more rustic looking, the better!  You can re-use the wire as you practice.  After a couple
attempts, you'll have an unrefined look, which is what you want!


Wallah!  

See other Assemblage Jewelry

I hope you've enjoyed this month's DIY.
Even more-so, I'd like to see YOUR projects!
Please post and share your re-assemblage projects here.


Warmest Aloha, Susan, aka The Charm Hunter
Visit my shop, One Charming Treasure

Friday, February 14, 2014

February's DIY - Dangle Earrings 

from www.TheCharmHunter.com


Perfect for any occasion, from casual to dressy, these beauties only take a few supplies & a few moments to make.

Design by The Charm Hunter
I recycled these beads from an out of style clip on earring!

The Charm Hunter's Supply List:
  • about 1 inch of chain, 2 pieces
  • 2 ear wire hooks
  • 7 small jump rings
  • 7 beads, preferably with head pins
  • 2 pair jewelry pliers


I've said this in just about every blog, SAVE YOUR BROKEN JEWELRY!
This is my stash of broken chains in all different sizes and colors.

  • attach ear wires to top of chains
  • attach each jump ring to each bead used
  • arrange the beads around the chain and play around with the placement until you're happy with the look.  You can always move them around after
  • use pliers to attach to links of the chain at varying lengths
I used the largest bead at the bottom and worked
my way up with the next smallest, ending
with the smallest beads on top.
The combinations are endless.  This is just the "starter recipe".  

Simple                                                             Full                                                                     Fuller

  If you want fuller earrings, just connect the loaded jump rings

together.  For a longer look, you can use less beads or connect
empty jump rings between your loaded jump rings.  Varying 
sizes and shapes also help to add interest to your mix.


Thanks always, best wishes for a happy and healthy 2014 :)


-Warmest aloha, Susan, aka The Charm Hunter
Visit my shop at One Charming Treasure

Thursday, January 30, 2014

Happy New Year!

Susan here from TheCharmHunter.com.
 I've been as busy as ever charm hunting and creating
one-of-a-kind treasures.  My custom orders have increasingly been my best sellers!
You can heck them out at my etsy store.


Is it the end of January ALREADY?????
I know how busy life can be - I'm married with children and pets
 and work outside the home like many of you do and can appreciate that your time is important
 to you.  Because it's important to all of us, I've decided to take a different approach to my blogs this year in 2014.
*******
Follow me - once a month - as I take you through simple jewelry making fun DIY tutorials
.  Your comments and questions are always welcomed.  I'm so excited to have a blog where
I can share jewelry making with you.  Information is gold  :)


Have you kept your New Year's Resolution thus far?

Well, I'll share with you one of my 2014 resolutions:  As a jewelry designer, I'm always on the lookout for new ideas, new products and new materials to work with.  I absolutely LOVE the hunt and disassembling parts and pieces to create new one-of-a-kind items and custom orders for others.  That's the problem - for others.  

My goal is pretty simple:  To wear accessories with each and every outfit;
 with shorts and T-shirt, with my work uniform, with dressy outfits, etc.

Simple yet stunning starburst layered with a cross charm necklace

Accessories will always play an important role in
fashion and they are often used to express one's individuality.


      January's SIMPLE tutorial - layering!     


Most of us would have those times when we don’t feel like putting too much thought into 
our attire for the day but don’t want to appear sloppy or plain jane-ish. 
This is when accessories come to our rescue
We can choose to layer on necklaces or bring along a statement bag for that panache to your ensemble.

Begin by layering two or three of your own necklaces
of different lengths and styles to create a stylish new look at NO cost!


Find your own combination of varying lengths of necklaces


 There’s no hard and fast rules as to what you can do with your accessories 
so feel free to foray into unmarched territories!


Come visit me at