Tuesday, May 28, 2013

          DIY Vintage Style Initial Charms...

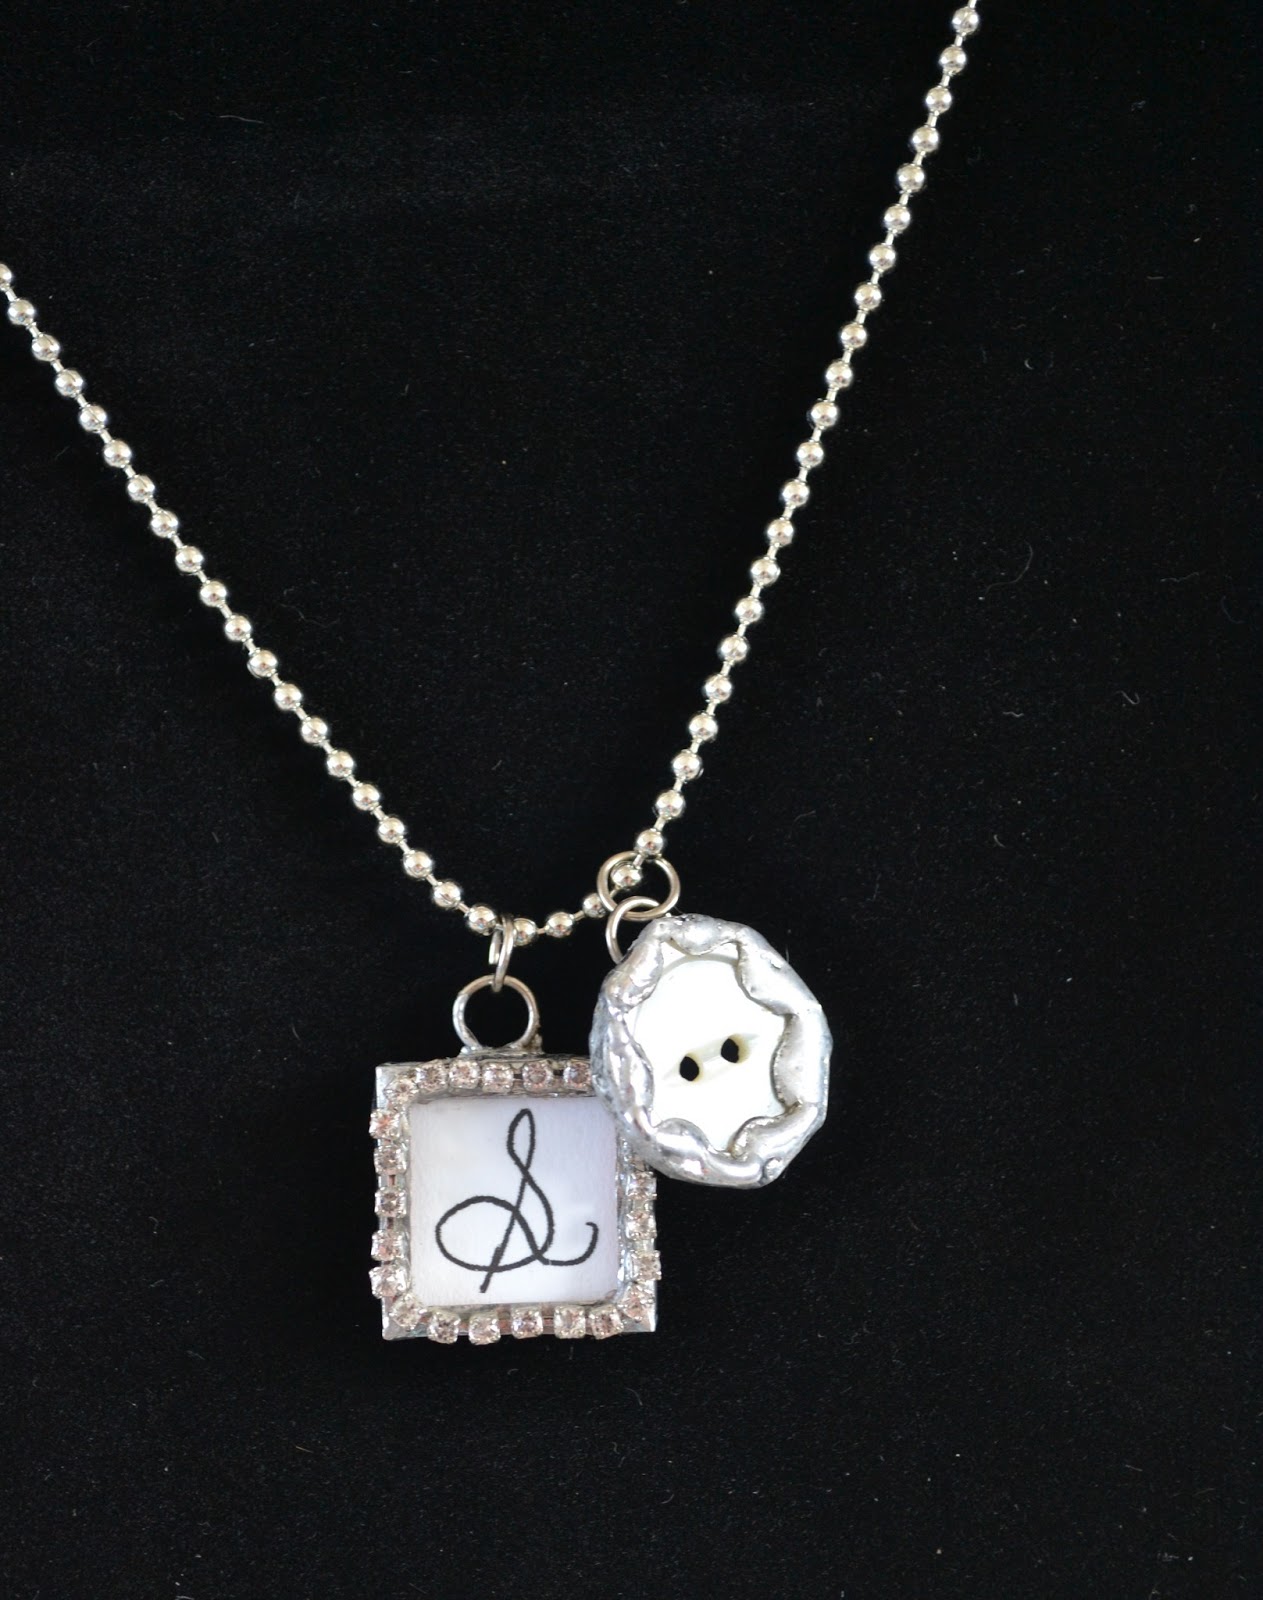
You can achieve this same "Vintage" look
with or without soldering
If you're not soldering, you can still achieve a similar look by using 
silver ball chain, and your own photo paper and printer.


Practice on regular paper then copy to a heavy
quality photo paper and cut to size
You can add seed beads OR rhinestone strands.
If you use seed beads, I recommend sticking
them in the tray first and then cover with a glaze.
Any glaze you use will appear
milky but will dry clear.  

If using the rhinestone strand, fill with glaze about 3/4 full,
then carefully lay the rhinestone strand around the perimeter
on top of the glaze.  The weight will cause the glaze and the
rhinestone strand to rise.  You can always add more glaze 
to the center to bring to desired height.  Pop any air bubbles
with a needle.


Now if you are soldering, follow steps above, but instead of
placing in a pendant tray, sandwich between glass, wrap with
copper tape and solder.  You can use your initial between
glass or other items, such as lace, a feather, a dried 
pressed flower or a lock of baby hair; the possibilities
are endless, but the end result is beautiful!


Please Like this on Facebook... I have a lots of ideas to 
offer and would love for you to keep connected!

Wednesday, May 22, 2013

Spring showers bring May flowers...


And who doesn't like roses?  I saw the most beautiful rose print pendant 
under glass on pinterest.  Have you heard of this photo idea sharing site?  
It's addicting, let me tell you, but it has an abundance of useful ideas.  
Some photos have links to additional information, others do not.  
The pendant I saw did not have a source or tutorial attached to it, 
but I figured out how to make my own and you can too! 

You can use salvaged chandelier pieces, buy individual crystals on etsy or purchase a set in your local craft store from Tim Holtz brand.


place prism over desired image to fit
I used a magazine image of a bouquet of roses
cut image to fit back side slightly smaller
than the prism itself; punch hole through
the image with a needle to meet the
hole already in your prism
  
paint adhesive on back of prism,
place paper image so the image
  shows through the front.                                                                                  

OK, pretty simple so far.  Once you've cut out your image to fit slightly smaller than your prism, 
glue to the underneath side. Usea needle to poke a hole through the paper to the hole already on 
your prism.  Coat another layer of glue to the back.  At this point you can glue another final cut 
out paper to the back side that will serve as your backside.  This can be script from a book, bible, 
magazine, song sheet or just pretty (or plain) patterned paper.  Thinner paper is easier to work 
with.  Follow the same procedure by adding a heavy coat of adhesive and punching a hole through.
The adhesive will dry clear, even though it goes on thick and milky.  (You may need to press down
some ends of the paper to help adhere)


meticulously wrap and trim in copper foil

   
This is where you can take your 
project to the next level.   The 
pendant is beautiful as is, but I    
L O V E   to solder.  Silver 
soldering not only adds value, 
but it's that hand made one-of-a-kind 
artisan look that  I'm looing for.
completely encase flat back


solder away!


beautiful shapes and sizes are available to experiment with


You can embellish with rhinestones as shown here and use a variety
of chains & necklaces to showcase your piece
B E A U T I F U L

                                                                       see other images here


For more custom gift ideas, like us on facebook where new ideas, 
products and inspiration added regularly. 


Tuesday, May 14, 2013

A Mother's Day Surprise...

         I was reading one of my favorite magazines, Real Simple, and came across an
         interesting factoid received from their Mother's Day online survey:

         "When we asked moms for the most meaningful gift they had ever received, 
      30 percent said it was homemade."     (May 2013)


      I couldn't agree more!  This was a custom made charm bracelet featuring a mother's
      greatest joy, her precious grandchildren; honoring "Nana" this Mother's Day :)

                                                                   
                                                                 See other images here

                                                                  Additional gift ideas