Monday, August 11, 2014

Vintage Watches

AUGUST JEWELRY DIY

brought to you by The Charm Hunter

"Vintage Watches" Bracelet


"Vintage Watches" Bracelet
This month's inspiration came from a jewelry catalog that featured a similar bracelet
for $190 !   I was like, what?!  I think I can make something similar for far less...
You know how I always stress NOT to EVER throw away broken or mismatched
jewelry or stuff that's just out of style.  You can re-use all those pieces into new creations,
which is what my blog exemplifies.  Vintage Assemblage.  Reusing, Recycling and
Repurposing Vintage jewelry pieces into beautiful new jewelry!


Supply List:

  • 5 watches, working or not
  • 20 gauge wire, silver or gold
  • 1 toggle closure
  • Scissors, Pliers, Wire cutters

Instructions:

1.  Remove straps and watch bands. Leather ones can be
simply cut with scissors. Some metal bands are thin and
can also be cut with scissors. 


Thicker bands will need to be cut with wire cutters 
and plied off with pliers.


Some watches have a tiny "tension" bar.  If this falls out while removing the straps, it's very easy to "snap" back into place.


The end result that you want is the watch face center
with open ends for reattaching:


2. Repeat with remaining four watches.  Remove bands.


3. Using your 20 gauge wire, cut 3 inch strips. Fold into a 
loose " U " shape and weave through one end of watch face:


4.  Weave the other ends through the second watch face:
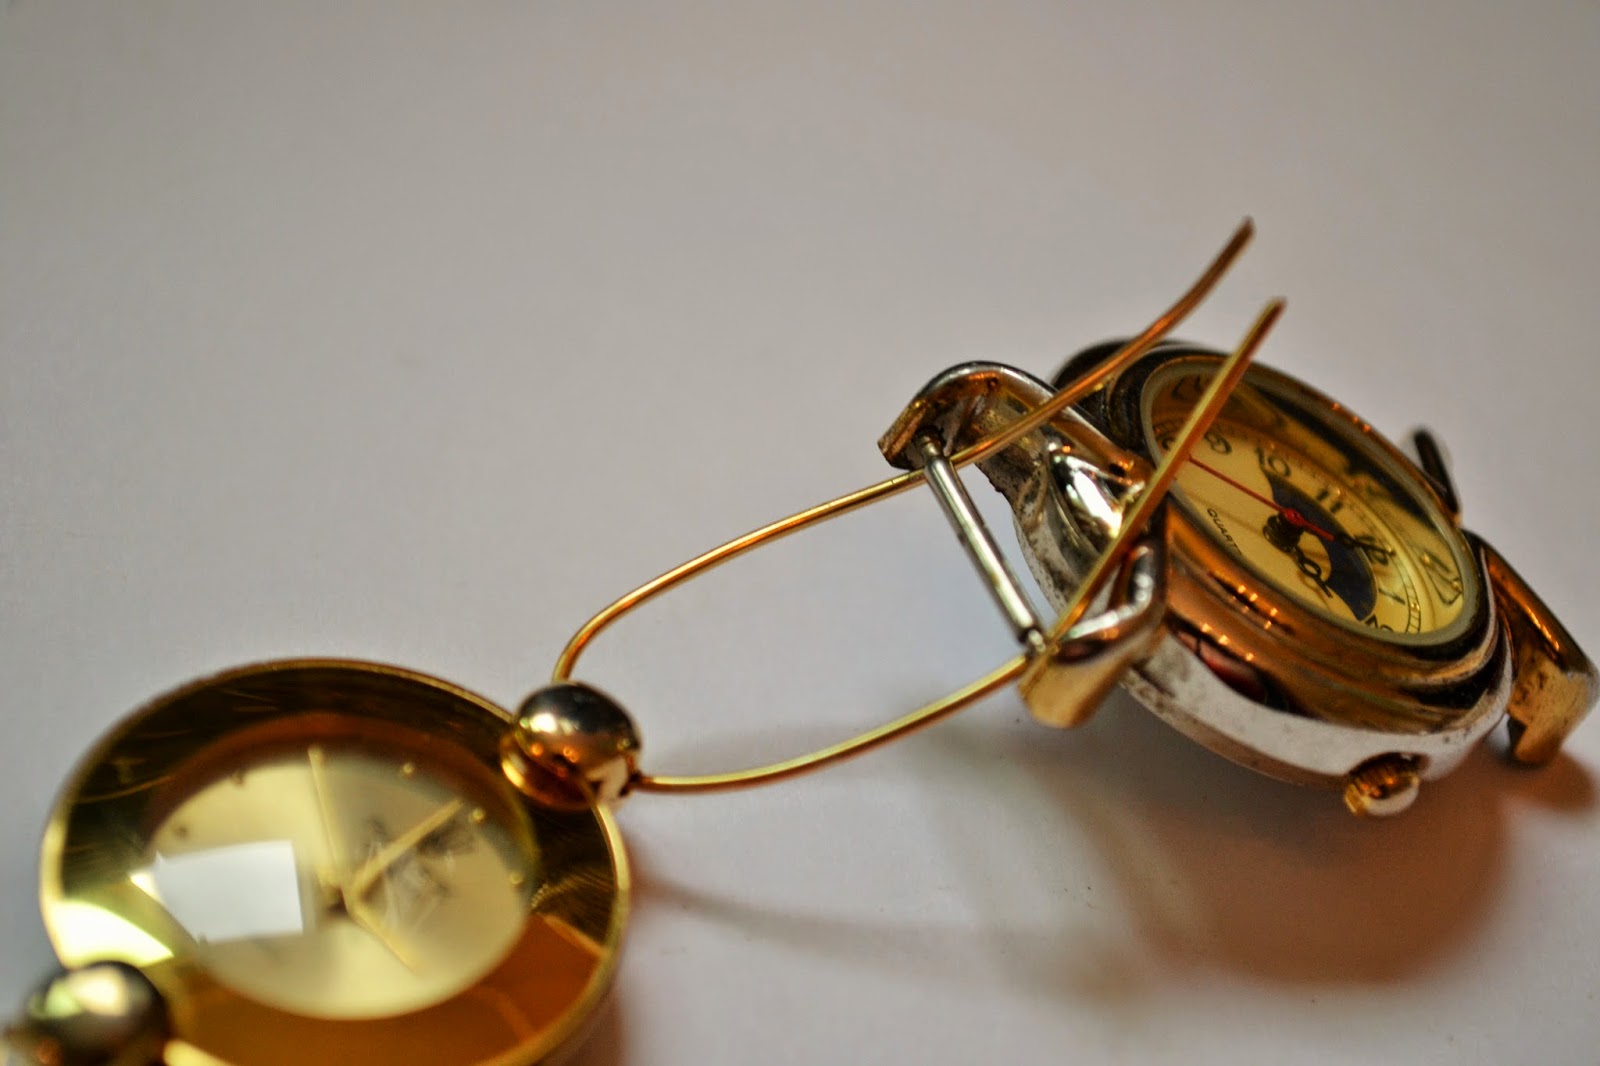
5.Pull through enough to leave about a half inch distance
between the watch faces.  With this excess of wire that
you've pulled through, use your pliers to do a simply
yet tight wrap, and just keep wrapping until there's no
more wire to wrap. Just pull and continue to wrap the wire
around and around.


Continue above steps until all watch faces are connected,
EXCEPT for two ends.  It's OK if the watch faces are NOT all
in the same direction.  This way it doesn't matter which way
you put the bracelet on...


6.Once you reach your two ends, assemble your toggle ends
using the same wire wrapping technique.  Remember, Wire Wrapping
101 is nothing difficult, just a simple twisting of wire.  Your
end result is NOT perfection, but a simple wrap around.

Whallah! 
How clever is this?

Wallah, wrist fancies!


A pretty gold and silver mix from a varied assortment


I hope this has inspired you!

See more at TheCharmHunter.com

Visit my shop here

Your questions and comments are always welcomed.

Warmest Aloha, Susan

Wednesday, July 23, 2014

JULY JEWELRY DYI

Brought to you by The Charm Hunter

A beautiful yet easy layered charm necklaces
Purchase Project Necklace


Supply List:

  • 6 strands of chain 
  • 1 rhinestone strand/necklace
  • 2 10mm jumprings
  • 3 charms
  • 1 clasp set

Instructions:

1. Pull out those unwanted chains and necklaces 
that you never wear, OR purchase some from your
local craft store.


2.  For this project, I chose six brass chains,
two of each style in lengths of 20 - 22 inches each.   


3.  Gather all the ends together and connect onto 
one jumpring.  If you are not familiar with using
jumprings, view this quick and easy tutorial first.
Repeat with the other ends of chain with the second
jumpring.


  4.  Attach necklace clasp.  Now you will have a 
    layered necklace strand of varying lengths.  


  5.  I added a rhinestone necklace to the strands
    for some added bling.  You can attach it to the
    jumrings or just wear as is on it's own resting on
    the layered chain necklace.


  6.   Last step - Add charms!  For this necklace
     I chose charms of Faith.  A Vintage crucifix, a wooden
     cross, and for the focal point, an antique metal saint
     charm.  This is a beautiful Italian religious charm I            recently found at an Antique Mall, which is a great
     shopping source to find the most unique jewelry elements
     to create your own jewelry assemblage projects.


+++++++++++++++++++++++++++++++++++++++++++++++++++++++++++++

I hope you've enjoyed this month's jewelry assemblage project!  Bookmark my blog and check back next month for more...


♥*¨)¸.•´¸.•*´¨) ¸.•*´¨)(¸.•´ (¸*´¨(♥ (¸.•´Thank you for visiting my blog. ¸.•´♥Read more about me and my jewelry at www.TheCharmHunter.com

Warmest Aloha, Susan

Wednesday, June 4, 2014

It's Graduation Time!

CONGRATULATIONS!

              Brought to you by The Charm Hunter           

June's DIY Project:    

Easy to make Graduation Money Lei

by One Charming Treasure 

Well, this is a different sort of "accessory", but I've had so many people asking me
how to make these leis that I decided to post instructions for June's DIY...
This is my handsome husband with our friend's son.
Congrats TJ !


CASH is always a popular gift for graduates.  In Hawaii, 
leis of flower, candy, Kukui nut or Ti leaf are also popular.  
So when I saw a photo of someone's "money lei" I thought 
how perfect is that; to combine them both into this unique 
gift idea that any grad would be happy to receive.  So, I 
gathered a few simple supplies and started the trial and error process of figuring out how to make these great leis of cash.

This particular lei was made with FORTY $1 dollar bills and came out very nice and full

Supply List:


  • 40 Dollar Bills (use any denomination or combination of denomination)
  • Curling Ribbon (consider using the school's colors)
  • Scissors
  • Black Cardstock for Grad Hat Label Cutout (optional)
  • Approximate time:  45mn for each lei

Instructions:


I began by scrunching the center of each bill and then tying a 12" piece of
curling ribbon very tightly in the center.  Only one tie is needed as opposed to
tying a double knot.  Use varying colors on each one of the forty bills.


Once you have all your bills center tied, begin connecting them with
alternating colored ribbons.  Take one ribbon from the left side of one bill 
and one ribbon from the right side of another bill and tie one single
tight knot.  You will want the bills to overlap slightly as you cinch the knot.


It looks best if you arrange the bills facing the same way, slightly
layered and cascading downward as you continue to add more.


Pretty soon you'll have a very long centipede looking stringer of
bills.  When you're at the end, simply tie one end to the other to
make your "lei" complete.


After tying the ends together, I made my own graduation cap
card out of cardstock.  This of course is optional, but this way
at the end of the celebration, the grad will know who gave them
THE BEST LEI EVER!


You can cut and copy this simple pattern or


Congrats Tayler!


Check out these popular graduation gifts:

Two Sided Hand Soldered Pendant
CLICK HERE TO VIEW


Graduation Charm Bracelet
CLICK HERE TO VIEW

Visit my online shop here for more graduation gift ideas!


             Read more about The Charm Hunter here


I would love to see images of YOUR money leis!  Post them here for all to see :)

Warmest Aloha, Susan

Martha Stewart - American Made 2014 - Nominee Badge

Sunday, May 11, 2014

Last Minute Mother's Day Gift Idea...

May's DIY project ~ hand stamped spoon charms

Custom Designed by The Charm Hunter

  I just LOVE these!  I did this project in an afternoon and you can too, providing
you have all the tools and supplies ready for some creative use.  I took four 
salvaged spoons and forks and repurposed them into beautiful charms in just 
7 steps.  They can dangle from a bracelet or necklace, even one alone with 
a pearl looks fabulous!  These monogrammed initial charms cans symbolize
names of children, grandchildren, wedding couples, or even lucky numbers!
This was made for my mom, one for each of her four children, two of which have
passed, which makes this even more sentimentally special.

Honoring my special mom on this Mother's Day with monogrammed
charms of your loving children, Susan, Michael, George & James.
We Love You SO Much! 


So I have stash that I collect from wherever I find them.  I usually see them in 
Antique Malls and Consignment Shops, as well as garage sales from time to time.
They come in plain or fancy.  "IF" you can buy them separately that's best, but 
most times they're sold in sets.  I've found that the knives are too thick, but the 
forks and spoons are PERFECT.  And, the thinner they are, the easier they are to 
work with, but sometimes, you just don't have that option.


Supply List:

OK, don't cringe when you see the necessary tools needed for this project.  If you don't 
have some of these tools, chances are your husband, in-law, neighbor or friend will.  
Otherwise, overall it's a small investment to make to personalized gifts for friends and 
family throughout the year!

  • Silverware/Flatware, of Sterling Silver or Stainless Steel
  • 8mm Jumprings
  • Necklace chain (I used a ball chain)
  • Single Pearl and Bead Charms
  • 24" Bolt Cutter
  • Power Drill with a bit made for METAL
  • Metal Stamp Punch Set
  • Sanding Block or Metal File
  • Fine Point Sharpie Pen
  • Piece of Scrap Wood
  • Tape
  • Safety Goggles

Step 1:                 
                              Cut ends off with bolt cutter

Step 2:
                                            Vigorously sand ends until dull 

Step 3:
            Determine hole placement with size of drill bit used 

Step 4:
                  Tape piece to wood block, mark spot and begin to
           drill.  Be patient.  These took about four 30 second
        drill sessions each using moderate pressure. (2mn. total)
WARNING!  your piece will be HOT

Step 5: 
                                            Hand stamp initial onto center

Step 6:
            Use a fine tip permanent marker to highlight indention

Step 7:
~~ W O W ~~
           Attach jumprings to each piece, then string onto a chain
                                 (If you're unfamiliar with jumprings read this tutorial first)


               That's it!  YOU can do this.

I just love repurposing vintage finds into new and 
beautiful creations.  Join me!  Click Here to see
the rest of my Assemblage Jewelry.  Read more 
about me and my work here.

Wednesday, April 23, 2014

April Assemblage DIY


May 11th is Mother's Day

~ create a special & meaningful gift ~

~ Beautiful Dangling Assemblage Cluster ~

from the Charm Hunter

This beauty can be assembled in one afternoon.
Grab a friend, you daughter or granddaughter and create
something beautiful together!  This would make a FABULOUS
Mother's Day gift too!
Grab that jewelry box, sewing kit and stash of broken pieces!  This is a fun
and wonderful "quality" time activity to spend with your best friend or loved one.


The Charm Hunter's Supply List:

             (double this list if creating with a friend!)
  • 30" (or more) link chain (a 15" drop)
  • toggle clasp
  • 6 pieces of short misc chain pieces
  • 8 6-8mm jumprings
  • 6 random jewelry elements                                     (pearls, stones, shell, buttons, pendants, bling, etc)
  • 2 pair pliers

                          THAT'S IT!


STEP BY STEP....

You'll need about 30" (+ or -) of any type of link chain.  You may already have or can 
purchase inexpensively at your local craft store.  I like this length because it fits right over 
your head without needing to add a clasp.  You'll also need a medium size toggle clasp
also readily available at your local craft store or online.


The two piece toggle clasp already comes with a link attached to each piece.  I've used 
two straight pins to show how I used a jumpring to attach each part of the toggle to the 
same link in the center of the link chain.  (Do not follow the instructions on the toggle clasp packaging.  We are using the toggle as a decorative element and not as a clasp.)  Use 
your pliers, one in each hand, to open the break in the jumpring by gently pulling and 
prying in opposite directions.  If you've never tried this before, view THIS LINK first.


Next, lay out six pieces of random chain.  They can be of any size and color.


Most pliers have a cutting portion on the top inside of the pliers.  If yours 
do not, you may need a pair of cutting pliers OR simply use the above method
in the link provided above to pry apart an individual link in the chain.  I planned
on each piece being no longer than 3".  Each strand should be cut at
different and random lengths.  There's no rules, just play around with
different lengths.  You can always cut them shorter if needed.


Here are my miscellaneous elements...shell, button, pearls, crystals, etc.


Use your pliers and begin attaching your elements to your pieces of chain.


Once you you have all your elements attached to the ends of your chain
strands, lay them out at varying lengths to see which need adjusting.
Move them around and shorten chains that need shortening.


Now open each jumpring wide enough to fit into the end of each chain link
and then onto the round part of toggle clasp.  Once you've attached to
 both pieces, pull and pry back into the closed position.
Continue with all chain strands.


Wallah!


See other Assemblage Jewelry


I hope you've enjoyed this month's DIY.
Even more-so, I'd like to see YOUR projects!
Please post and share your re-assemblage projects here.

               
                                        Warmest Aloha, Susan

                aka The Charm Hunter          Visit my shop here